
Introduction
In my last article here I talked about how to create an assessment with GravityForms.
In this article, you'll learn how to display the results of that assessment in a visually pleasing way.
Requirements
For this tutorial you'll need the following plugins:
1) Gravity View – Used for displaying results
2) Gravity Forms – Needed for this tutorial to work in the first place
3) Gravity Perks – A suite of upgrades to GravityForms functionality
4) Gravity Perks Post Content Merge Tag Addon – Gives you the ability to render content using merge tags.
Create a new Gravity View
1 – To create a new Gravity View go to WordPress Dashboard -> Views -> New View
2 – After clicking on the New View click Choose Data Source (select the form that you will use for this View)
3 – After doing that it, select Choose a View Type.
In this case select the Table View Format.

Configuring the view settings
After you create the view and click publish it will not display anything yet because you need to configure the settings first.

1 – Above Entries Widgets
In this option you have the widgets above the actual table like the search bar.
Personally, I don’t use it since I will use the pagination at the end of the table.

2 – Entries Fields
This is where all the magic happens…
First, add the new column to match your table requirements.
You will find all the form entries alongside the user details.
For example, if you have a field in your form to collect a user's email address, you can add it in your view table and the entry will be the value that the user enters in that field.

As you can see in the screenshot above I have added the following fields:
a) Date Entry – This is a feature from Gravity View that displays the date when the user completes the assessment
b) First name – Gravity Form field to collect fist name
c) Email – Gravity Form field to collect the email address
d) Category 1 – Gravity Form field (This is to display the results from the first category questions)
e) Category 2 – Gravity Form field (This is to display the results from the second category questions)
f) Quiz Percentage – Gravity Form to calculate the quiz percentage overall.
e) Quiz Results – I have added a custom field type with this link as content:
<a href='{confirmation_url}'> Quiz Results </a> This will allow your users to see their previous replies.
The {confirmation_url} is a merge tag made possible by the Gravity Perks plugin you installed earlier.
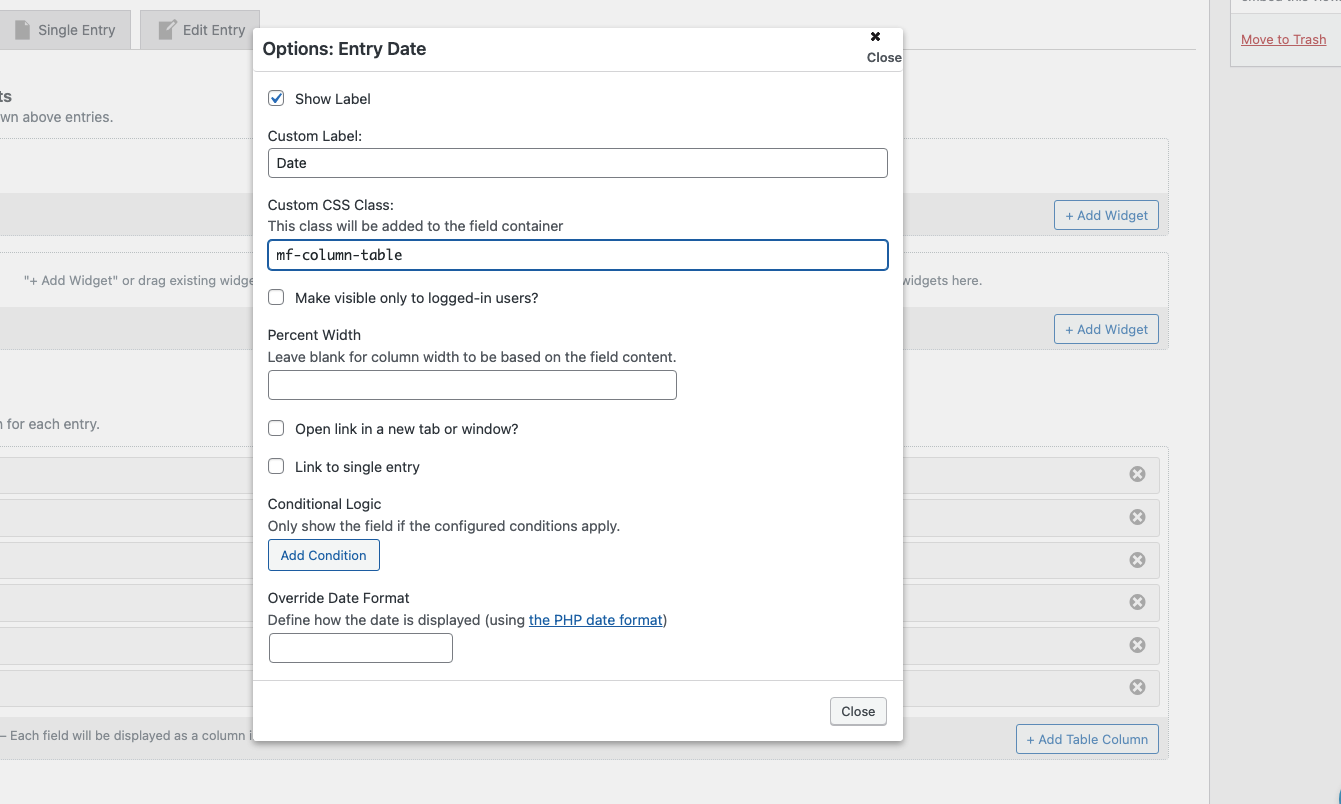
3 – Edit Entries Fields
After adding all the fields that you want to display on the table, you have to edit the columns table.

There are two main options:
a) Custom Label – Changing this will override the heading table on the front end
b) Custom CSS class – You'll need this later to add styling
For example, in this screenshot, I added:
a) Custom Label – Date
b) Custom CSS class – mf-column-table

Make sure that you save your changes after every change you make.
This will be the output when you change the Custom Label:

Repeat the same process with every field that you will have on the table.
4 – Below Entries Widgets
Here I recommend you keep only the pagination links.
However, if you want to add filters you will find the exact fields that you use on the Above Entries section indicated in the screenshot below.

View Settings
After you are done with the entries, you can customize the table view.
For example, in these settings you can set how many entries will be displayed per page, ASC sort or DESC sort, etc.
1 – View Settings
1 – Enable lightbox for images Learn More
This will be checked by default, if you are not displaying any images in the table view you can uncheck it.
2 – Show only approved entries Learn More
When you are installing Gravity View you have another option in Gravity Forms entries and that’s to approve entries.
If you want to show all the entries on the view you can uncheck this.
3 – Show all entries to administrators
On this option you can see all the entries in Gravity Forms by following this path:
WordPress Dashboard => Gravity Forms => Entries
I recommend leaving this unchecked.

2 – Multiple Entries
1 – Number of entries per page – Here is how many entries you want to display on the page (the default value is 25)
2 – Hide View data until search is performed Learn More – I strongly recommend leaving this unchecked
3 – Hide empty fields – It will hide any fields that aren’t in the table instead of displaying them with empty columns. I strongly recommend leaving this checked
4 – “No Results” Text – Customize the text if no entry is displayed on the table.
5 – “No Search Results” Text – Customize the text if no entry is displayed on the table after user performs a search action

3 – Filter & Sort
1 – Column Sorting – This is optional if you want to add sorting option on the column headings.
2 – Sort by field – Select from the dropdown that you want to sort the rows in the table ( the default one is the ID of the entry )
3 – Sort direction – How do you want to sort your rows from these two options ASC or DESC
4 – Sort by secondary field – This is in case if the first field sort is not working.
5 – Secondary sort direction – This is in case if the first sort direction is not working.
6 – Filter by Start Date – This should be left empty
7 – Filter by End Date – This should be left empty

Styling the table with CSS
Now you'll learn how to style your table.
I will provide you with a few code snippets for the basic design of the table.
Table Headings color
Before reaching this point in Configuring the view settings you added a CSS class.
It's time to use that.
.mf-column-table .gv-field-label {
Color: #fa8800; }
This will change the Column heading color.
Obviously, replace the Color “#fa8800” with the hex code of whatever color you prefer to use.

Preventing column overlapping
As you can see in the previous screenshot above, the email address field is overlapping with the category 1 column.
Here is how you can prevent this from happening.
.mf-column-table {
word-break: break-all; }
This will fix the issue for all the columns if you have bigger results in the table rows.

Remove the column headings in the footer
For some of you the double heading will look weird and want to remove it, as I personally don’t like this double heading both in the header and footer.
.tfoot {
display: none; }
Styling the Pagination
The default pagination style isn’t that cool, let’s add some design to it to make it more beautiful.
.gv-widget-page-links .page-numbers li a {
    border: 1px solid #fa8800;
    border-radius: 90px;
    text-decoration: none;
    color: #fa8800; }
If you copy this snippet, don’t forget to change the hex Color “#fa8800” with your own color.
Important Notice
Please remember that you have to replace the mf-column-table with your own CSS class.
If you have any questions or if need something, feel free to use the reply form and let me know in the comments below!


