
Introduction
In this article I will show you how you can create a quiz assessment with multiple scoring and display them on a confirmation page based on the lowest score category.
Requirements
In order to create this beautiful assessment you will need the following plugins:
1. Gravity Forms
2. Gravity Perks
3. Gravity Perks Post Content Merge Tag Addon
4. Insert Headers Footers
5. Any Page builder (Beaver Builder, Elementor, Divi, etc. ) – This is optional I will show you how you can create a result page with a page builder as well.
Create a new form
To create a new form you will have to go in WordPress Dashboard -> Forms -> Forms -> Add New Button

Create your form categories and fields
In order to create the quiz we will need the following fields:
– HTML field ( We will use this for the name of the category )
– Radio Buttons ( We will use this for the quiz questions )
– Number ( We will use this for the quiz category results )
1.1 HTML Field
We will use this field to create the heading for the quiz with something like this:
<h2> Category 1 </h2>

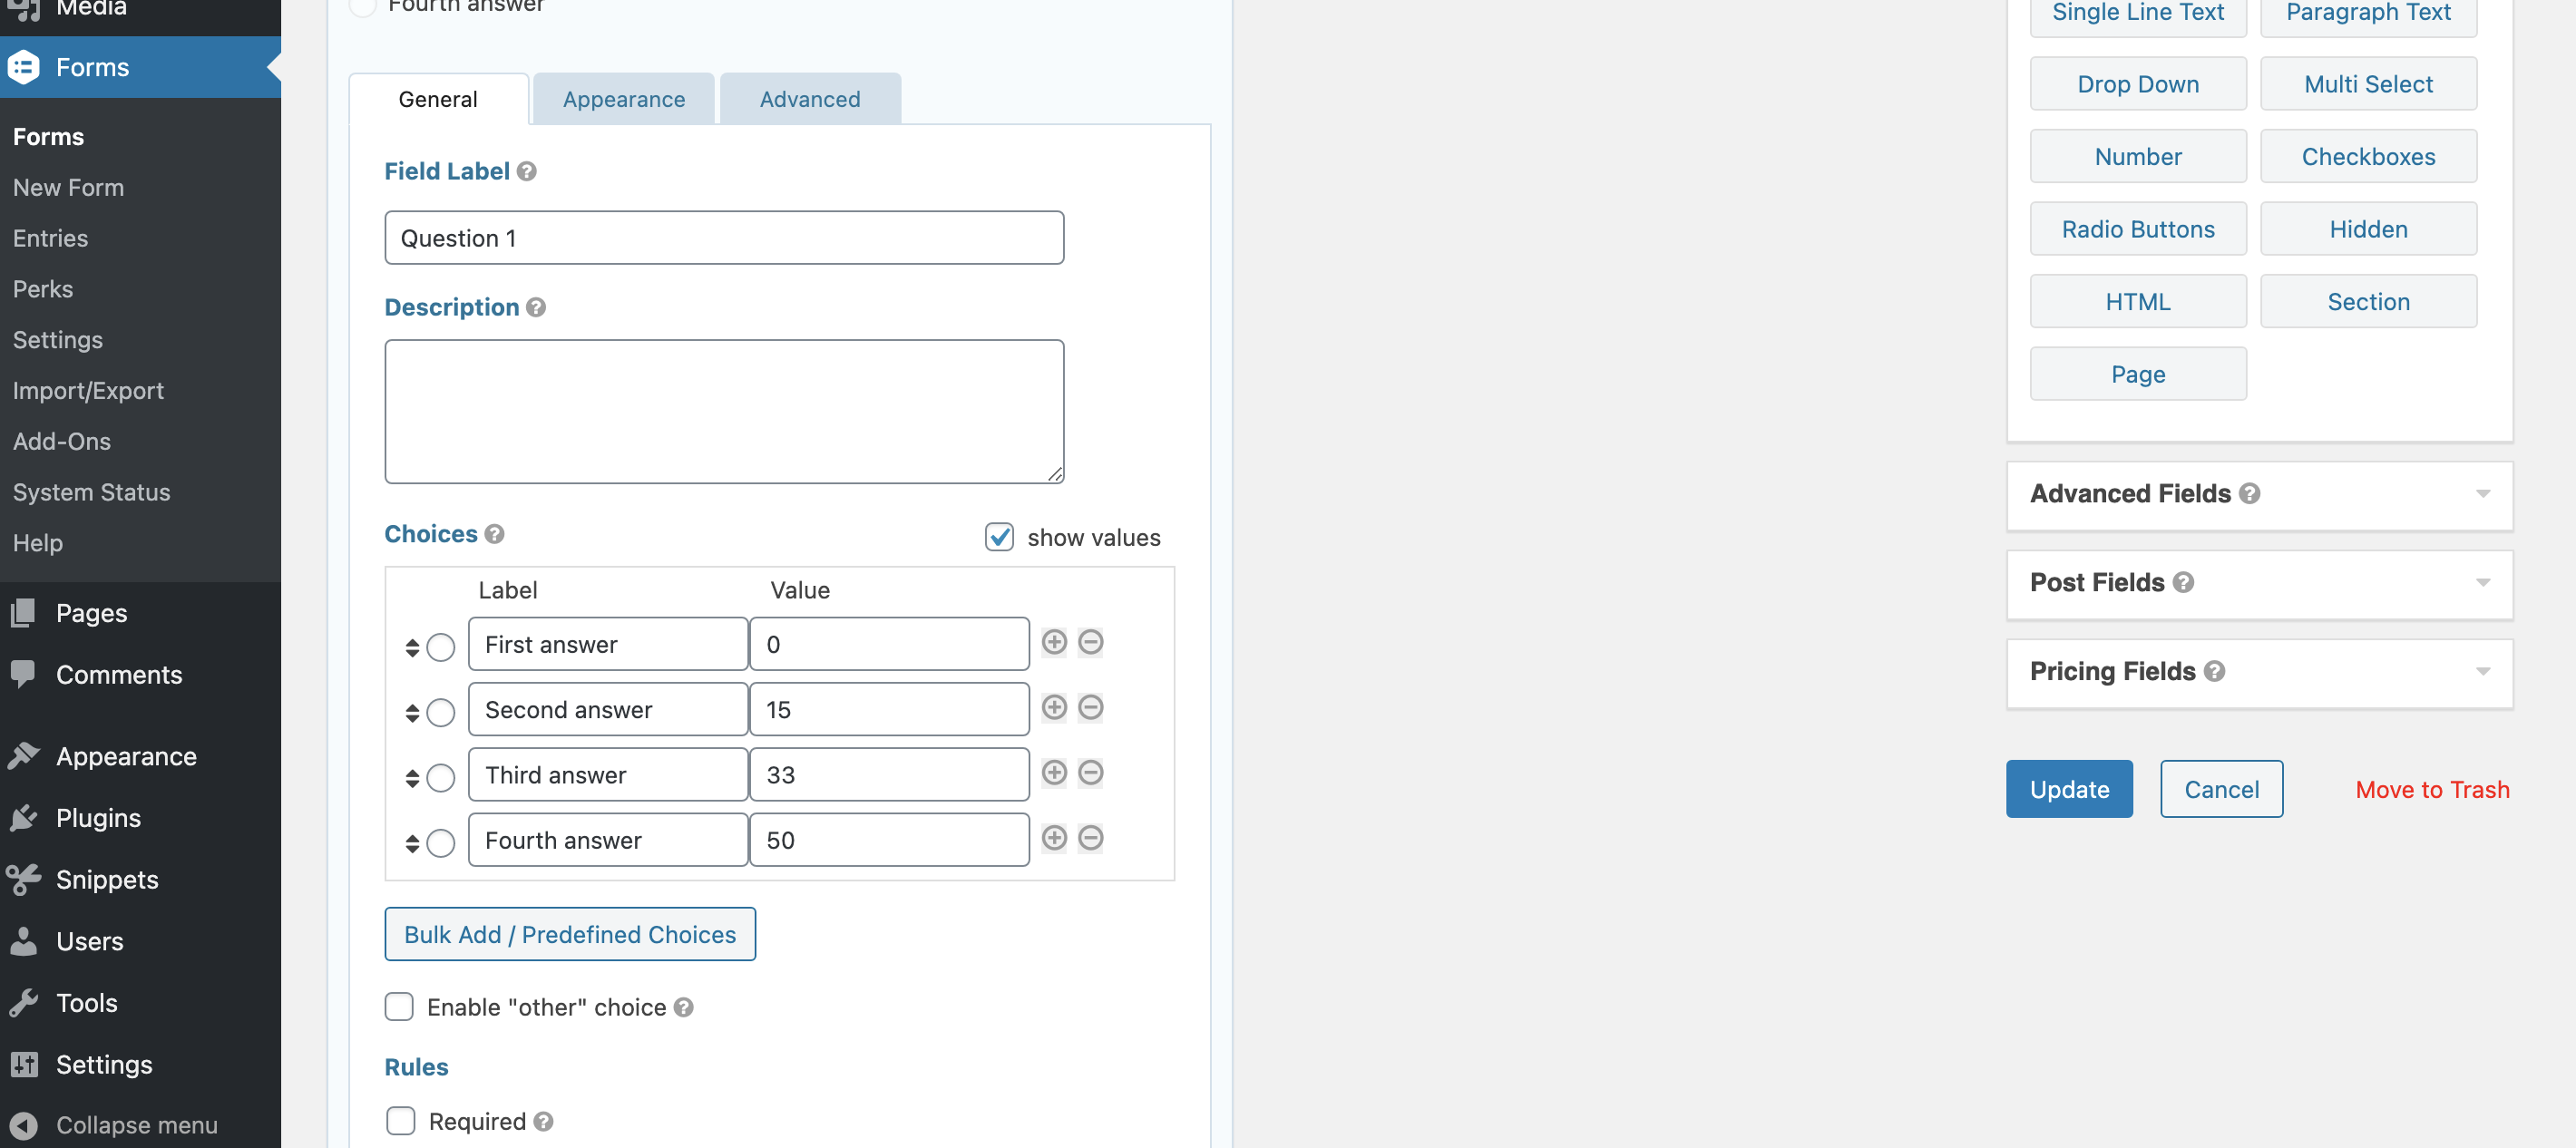
1.2 Radio Buttons
We will use this field to make the quiz questions, the tricky part is to assign the values.
To assign the values you have to check the show values checkbox from the field, those values are the scoring points that you will assign to each answer.
Notice: Based on how many question do you have in the category you will need to tweak the values (e.g: In our case we have 2 questions in the category, one answer will have 50 points and 1 answer will have 0, that way the maximum result that you will have on the category is 100% and the lowest will be 0%. If you will have 3 questions in the category the maxim points that you will add will be 33.3 instead of 50).
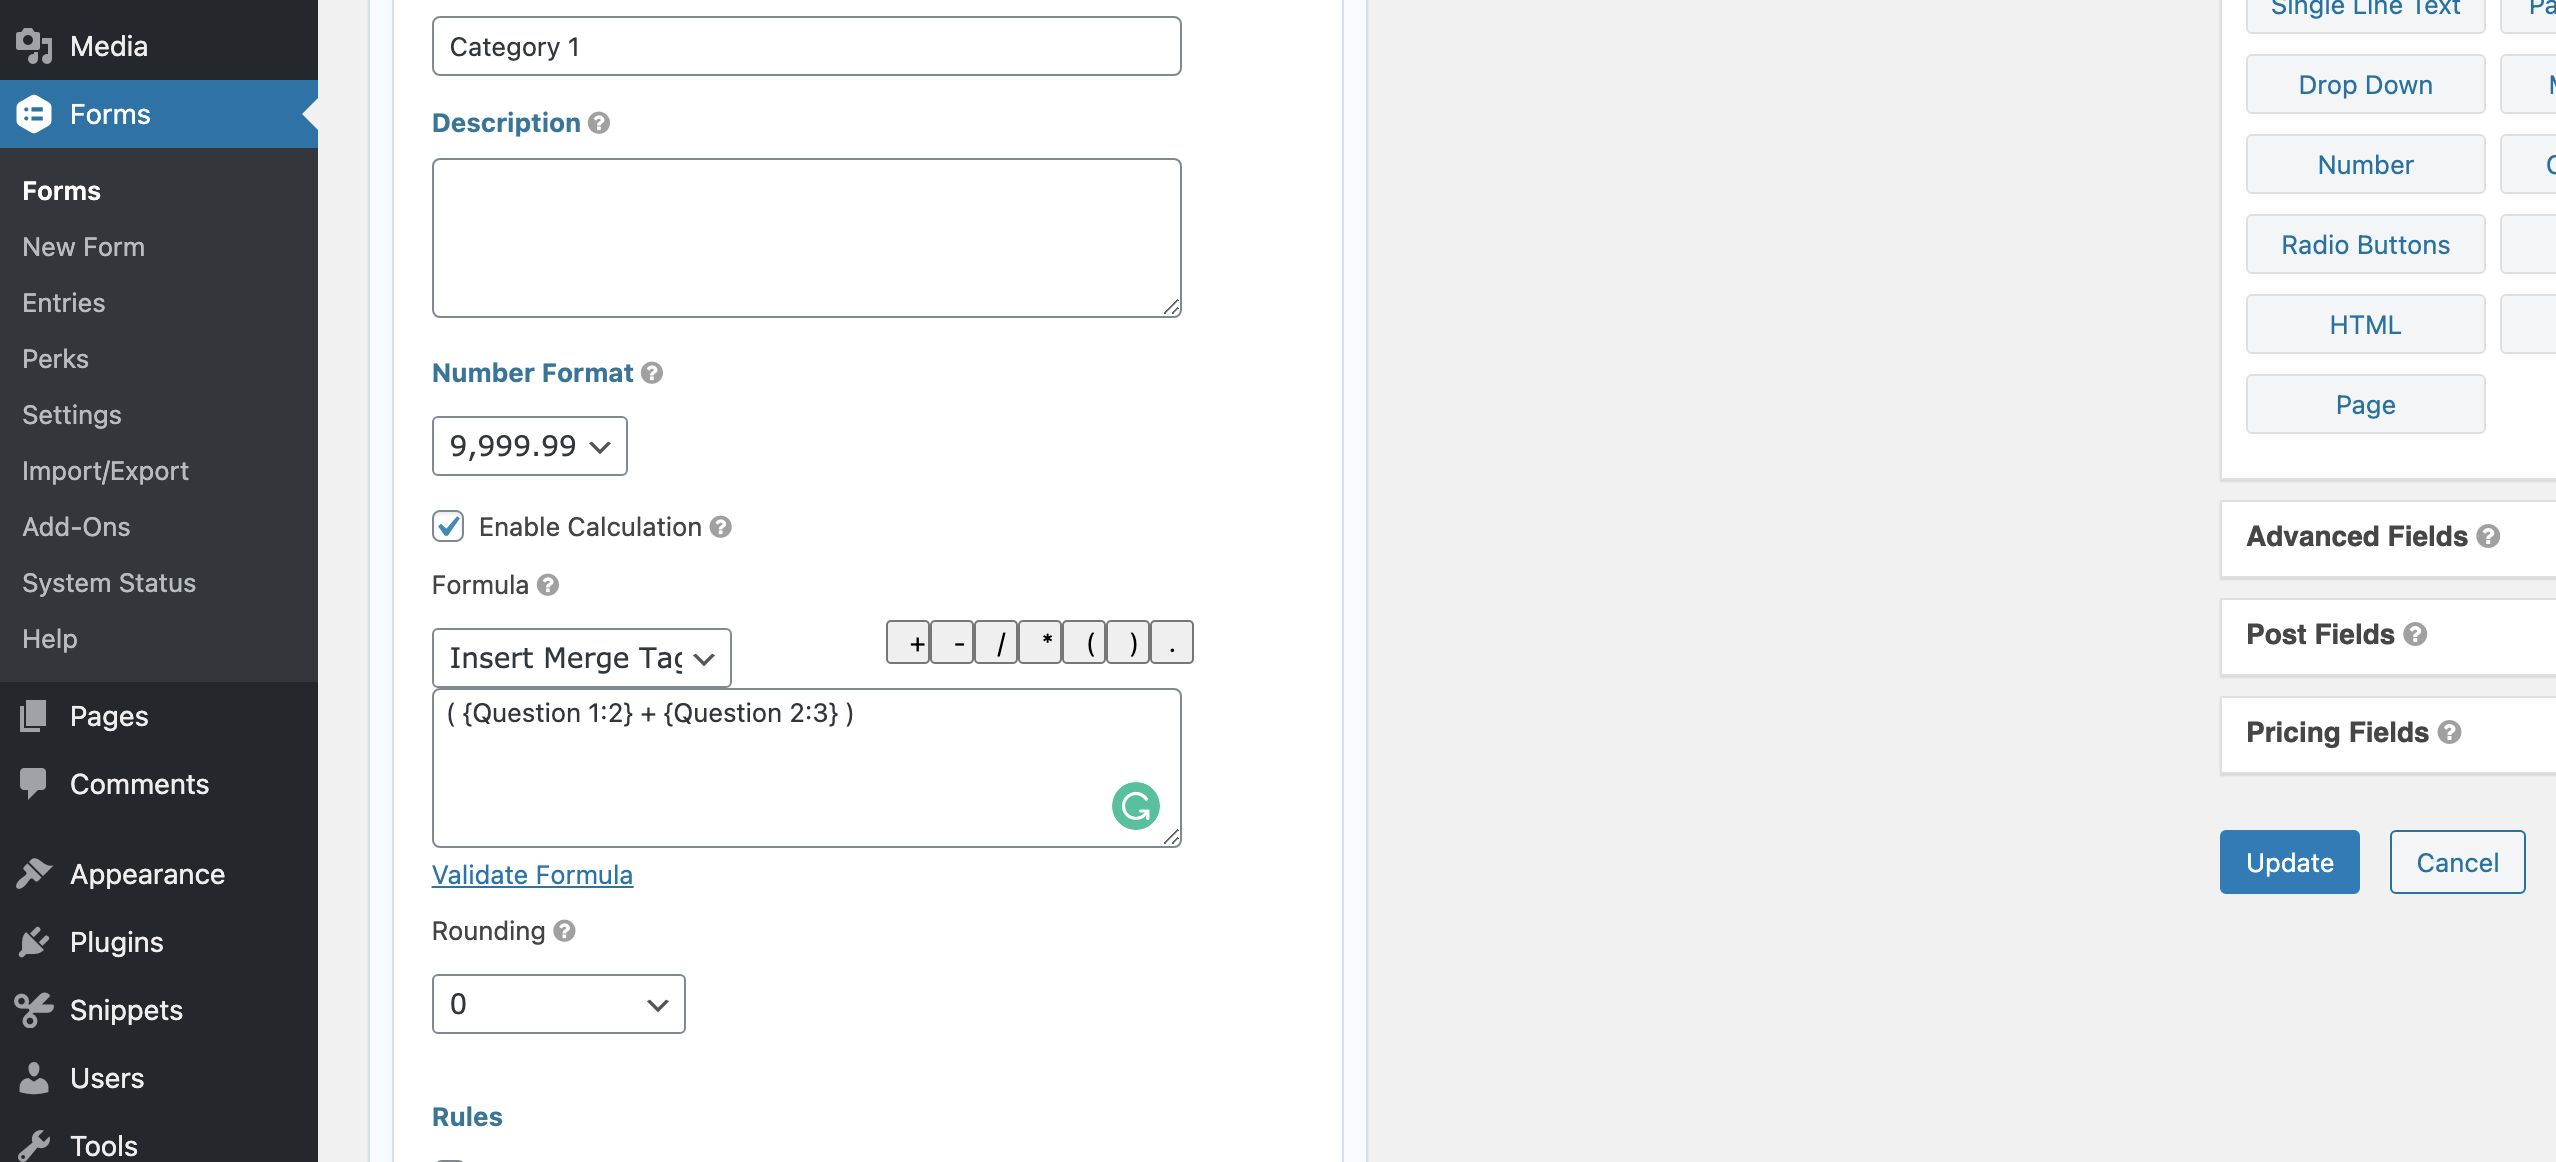
1.3 Number
Here is where all the magic is happening. We will use this field for calculating the category score percentage.
By default the calculation will not be in percentage, rather in normal numbers, we will have to add the % sign later on the confirmation page.
I strongly suggest you rename this field as the category name.
After you have added the field in the quiz, we will have to check the Enable Calculation checkbox.The Formula you will use the insert merge tags from the dropdown. The final formula will look like this in our case ( {Question 1:2} + {Question 2:3} )
Then we will have to change the “Rounding” dropdown to 0 from Do not Round.
This will round the number if you will have answers with decimal score example: 33.3 + 33.3 + 33.3 = 99.9 ( if the Rounding dropdown is set to round to 0, the result will be 100 instead of 99.9 ).
The final step on this field is to go to Advanced tab and check from Visibility the Hidden checkbox. We want this to be hidden from our users. ( the magic is happening in the backend ).
Then repeat the same process for all the categories that you will use in the quiz.
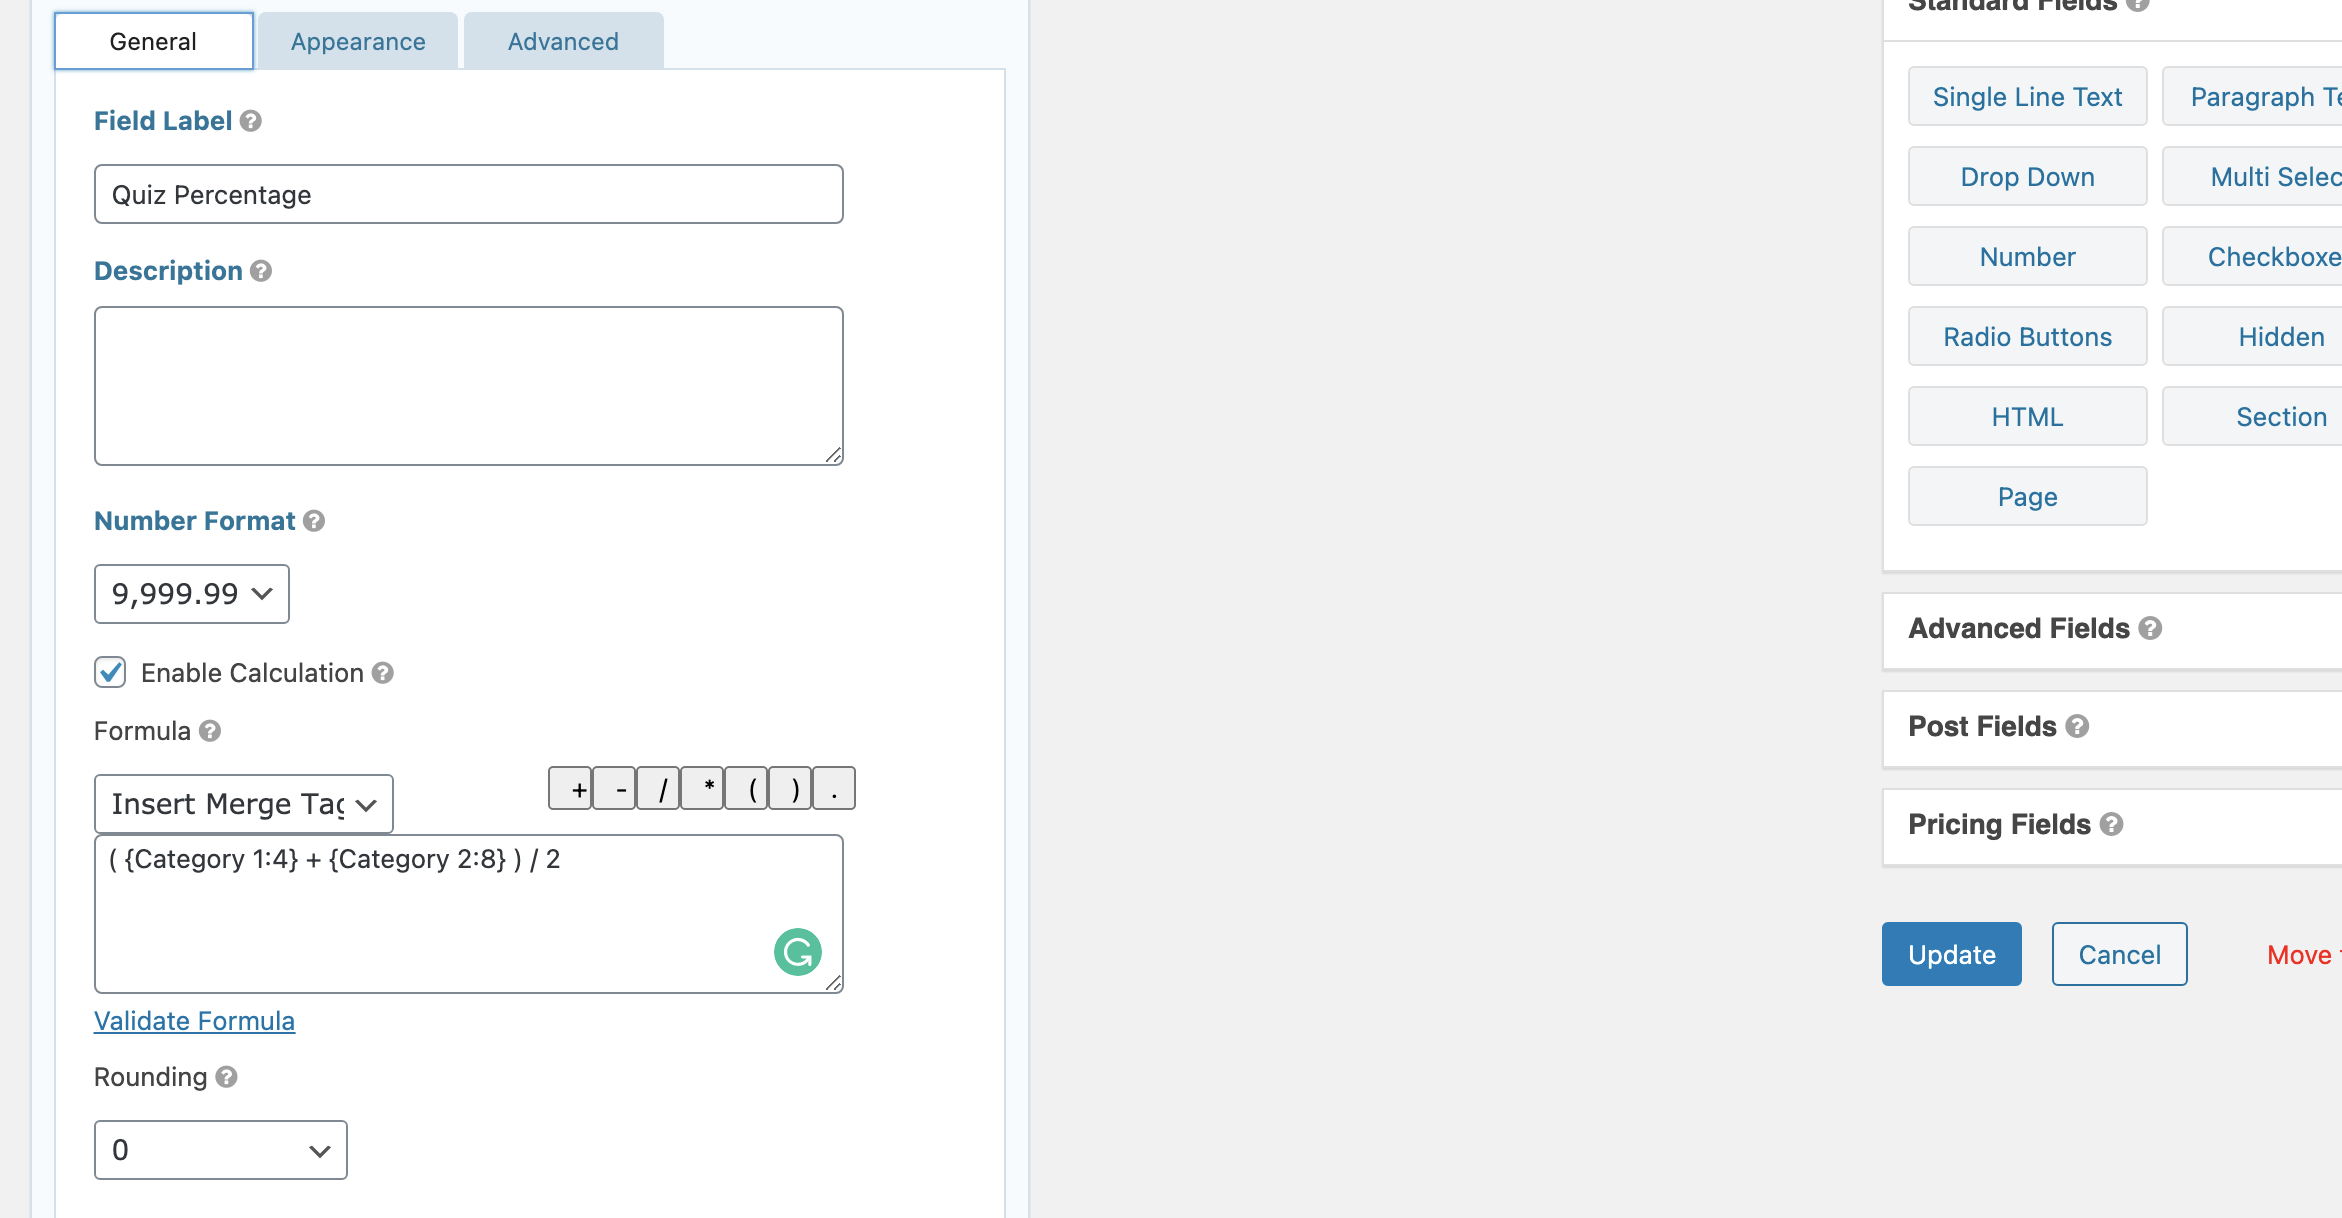
Create one final Number field to calculate the entire Quiz Percentage
The only two differences on this field is the name of the field, in our case, I named it “Quiz Percentage” and the formula: ( {Category 1:4} + {Category 2:8} ) / 2
To explain better this formula. I have added all the categories number fields in the parentheses then divided by how many categories we have ( in our case we have only 2 categories, if you have 3 categories the formula will be ( {Category 1:ID} + {Category 2:ID} + {Category 3:ID} ) / 3 ).
Display the Quiz and the Quiz results
1.1 Create the pages to display the quiz and the quiz results
In our case, I will create a page to display the quiz and the quiz results pages to display the results. To create a new page go to: WordPress Dashboard -> Pages -> Add new
1.2 Add the Quiz shortcode
After you have created the page for the quiz click on Add Form, select the desired form and click on add. It will automatically generate the shortcode
If you don’t see the same as me is because I am using the “Classic Editor plugin”.This is how the gravity form should look like:

If you are using a page builder, you can copy this shortcode and paste it in a text editor.
1.3 Create the confirmation in Gravity Forms
To do that we have to go in WordPress Dashboard -> Forms -> Edit -> ConfirmationsClick on Add New and you will see this:
To smash this confirmation into small pieces:
a) Confirmation Name – Here you will add the name for the Confirmation, I suggest naming the same as the category.
b) Confirmation Type – Make sure that here the page is selected and not the text, then select the page that you have created from the dropdown
c) Conditional Logic – Here you will use the number field from the confirmations to display the page based on the lowest category (e.g: Category 1 is less than 42, where the Category 1 is selected from the dropdown )
d) Post Content Merge Tags – Make sure that this is checked
This is how it will look like when you are done

Repeat the same process for all the confirmations
1.4 Add the Merge tags to the confirmation pages
Go to page, edit the one that you have created for showing the quiz results click on Edit Page,
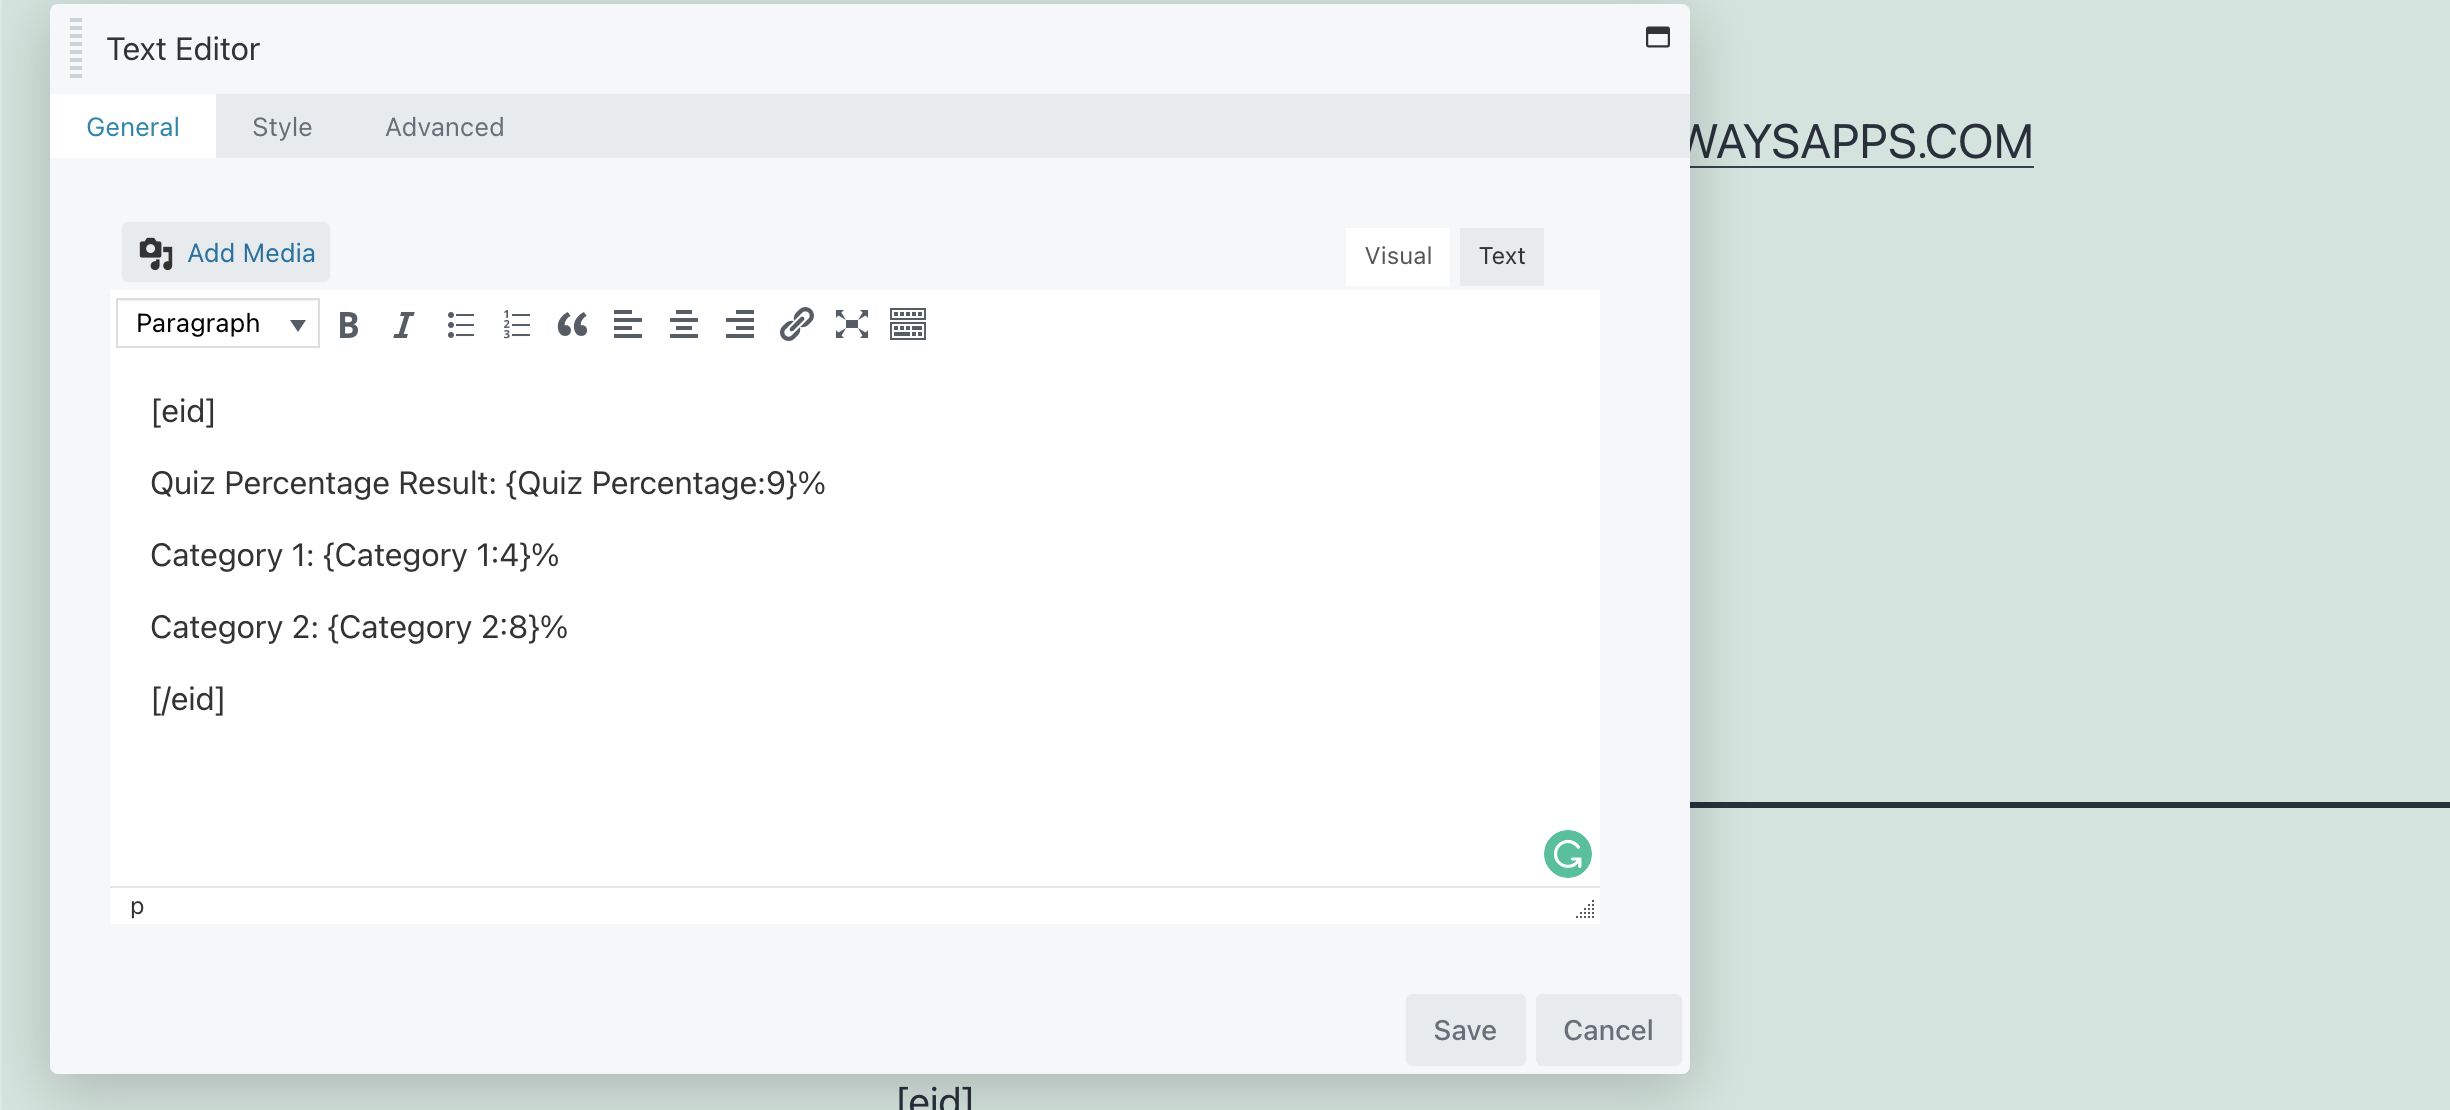
In the toolbar you will see a new button called Insert Gravity Forms Merge tags

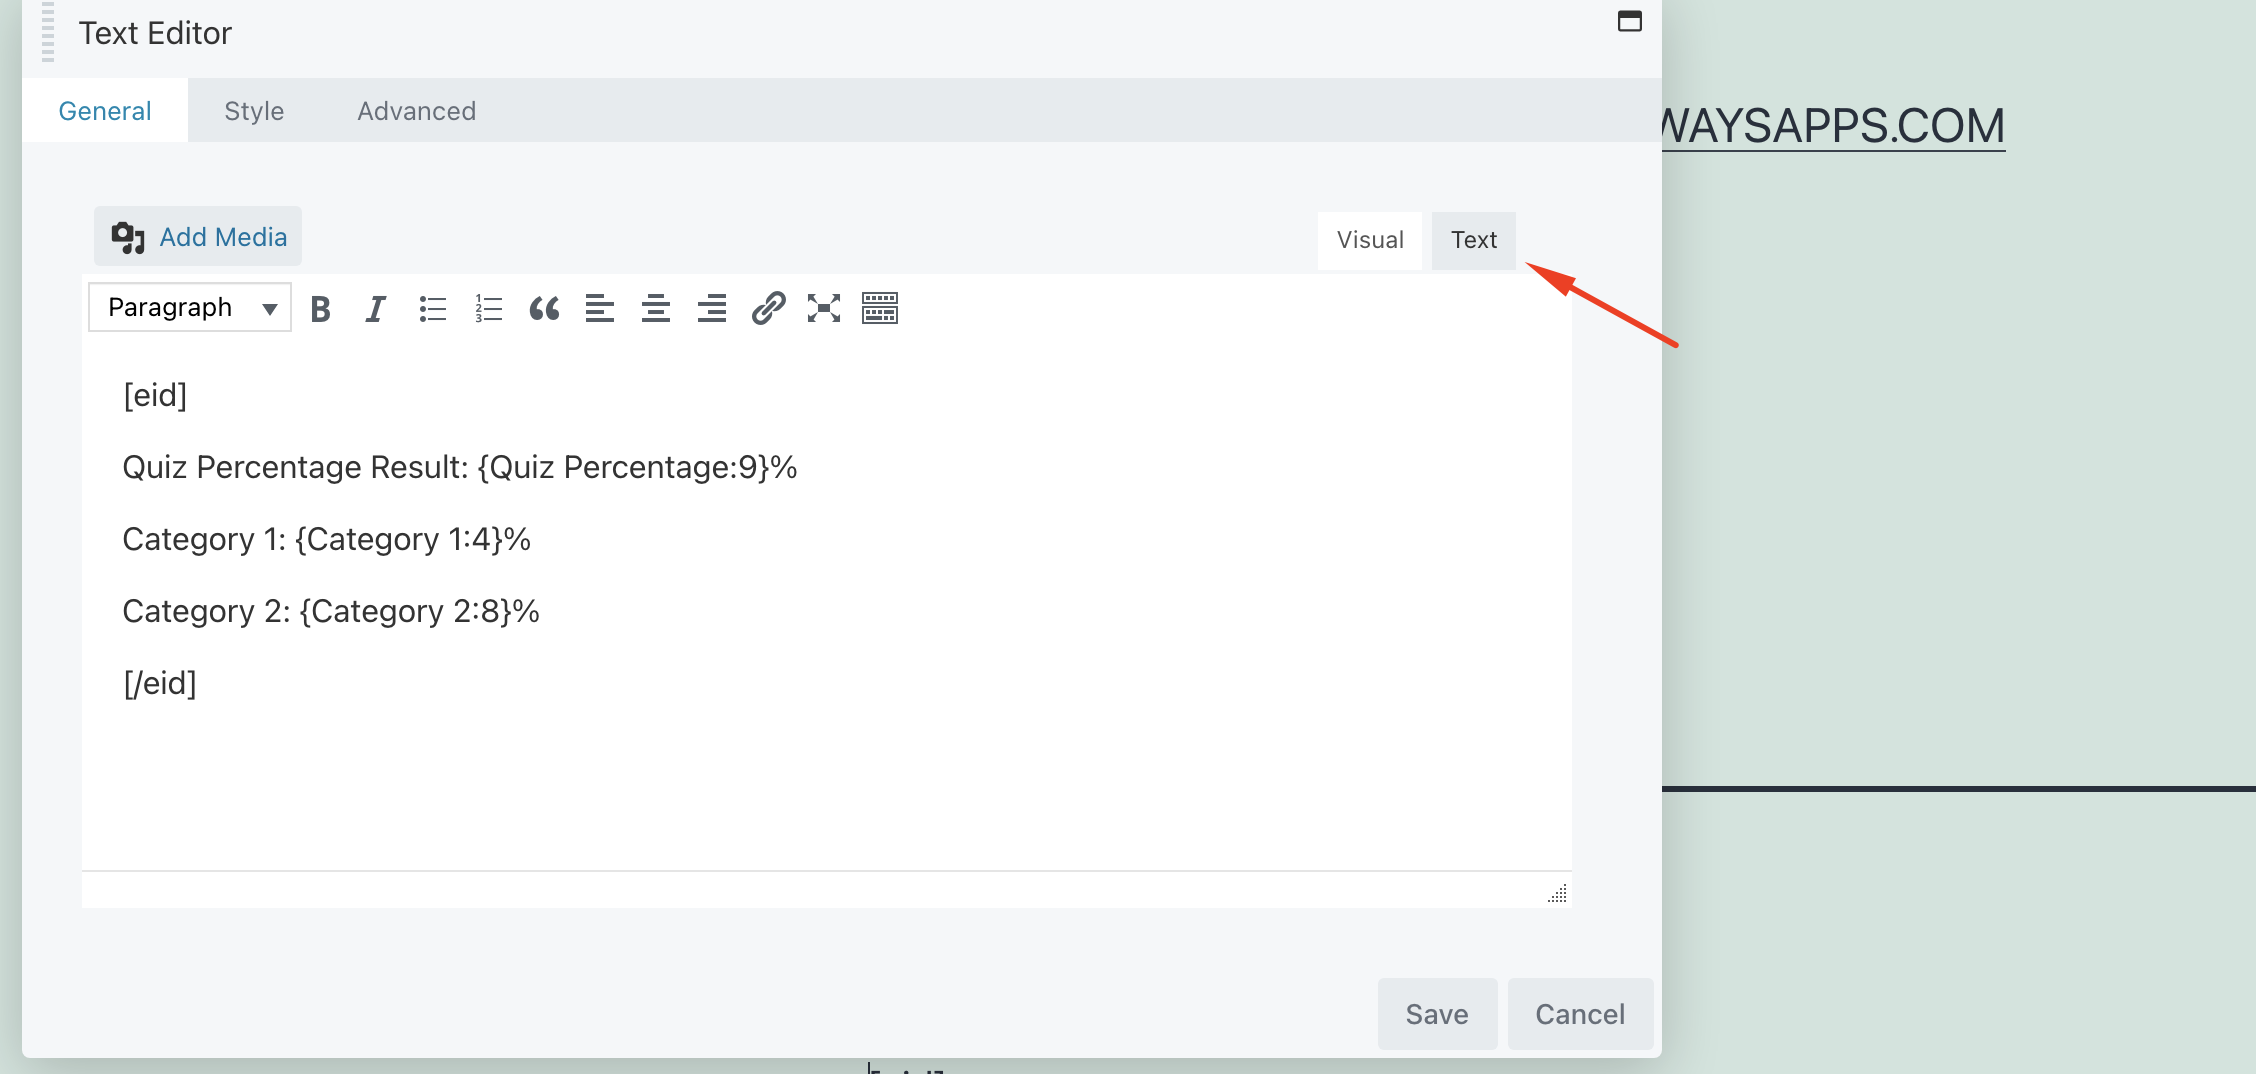
Click the button and add the merge tags that you want to display on the page, like you see in the screenshot above. I have added the the Quiz Percentage hidden number, and the categories hidden number fields.
Notice if you are using a page builder instead of the Gutenberg editor from WP you will have to copy all of the merge tags and add them between this shortcode [eid] [/eid]
Repeat the same process with every quiz results page you have created
1.5 Testing the quiz results page
After you are done with all the steps, we need to test it.
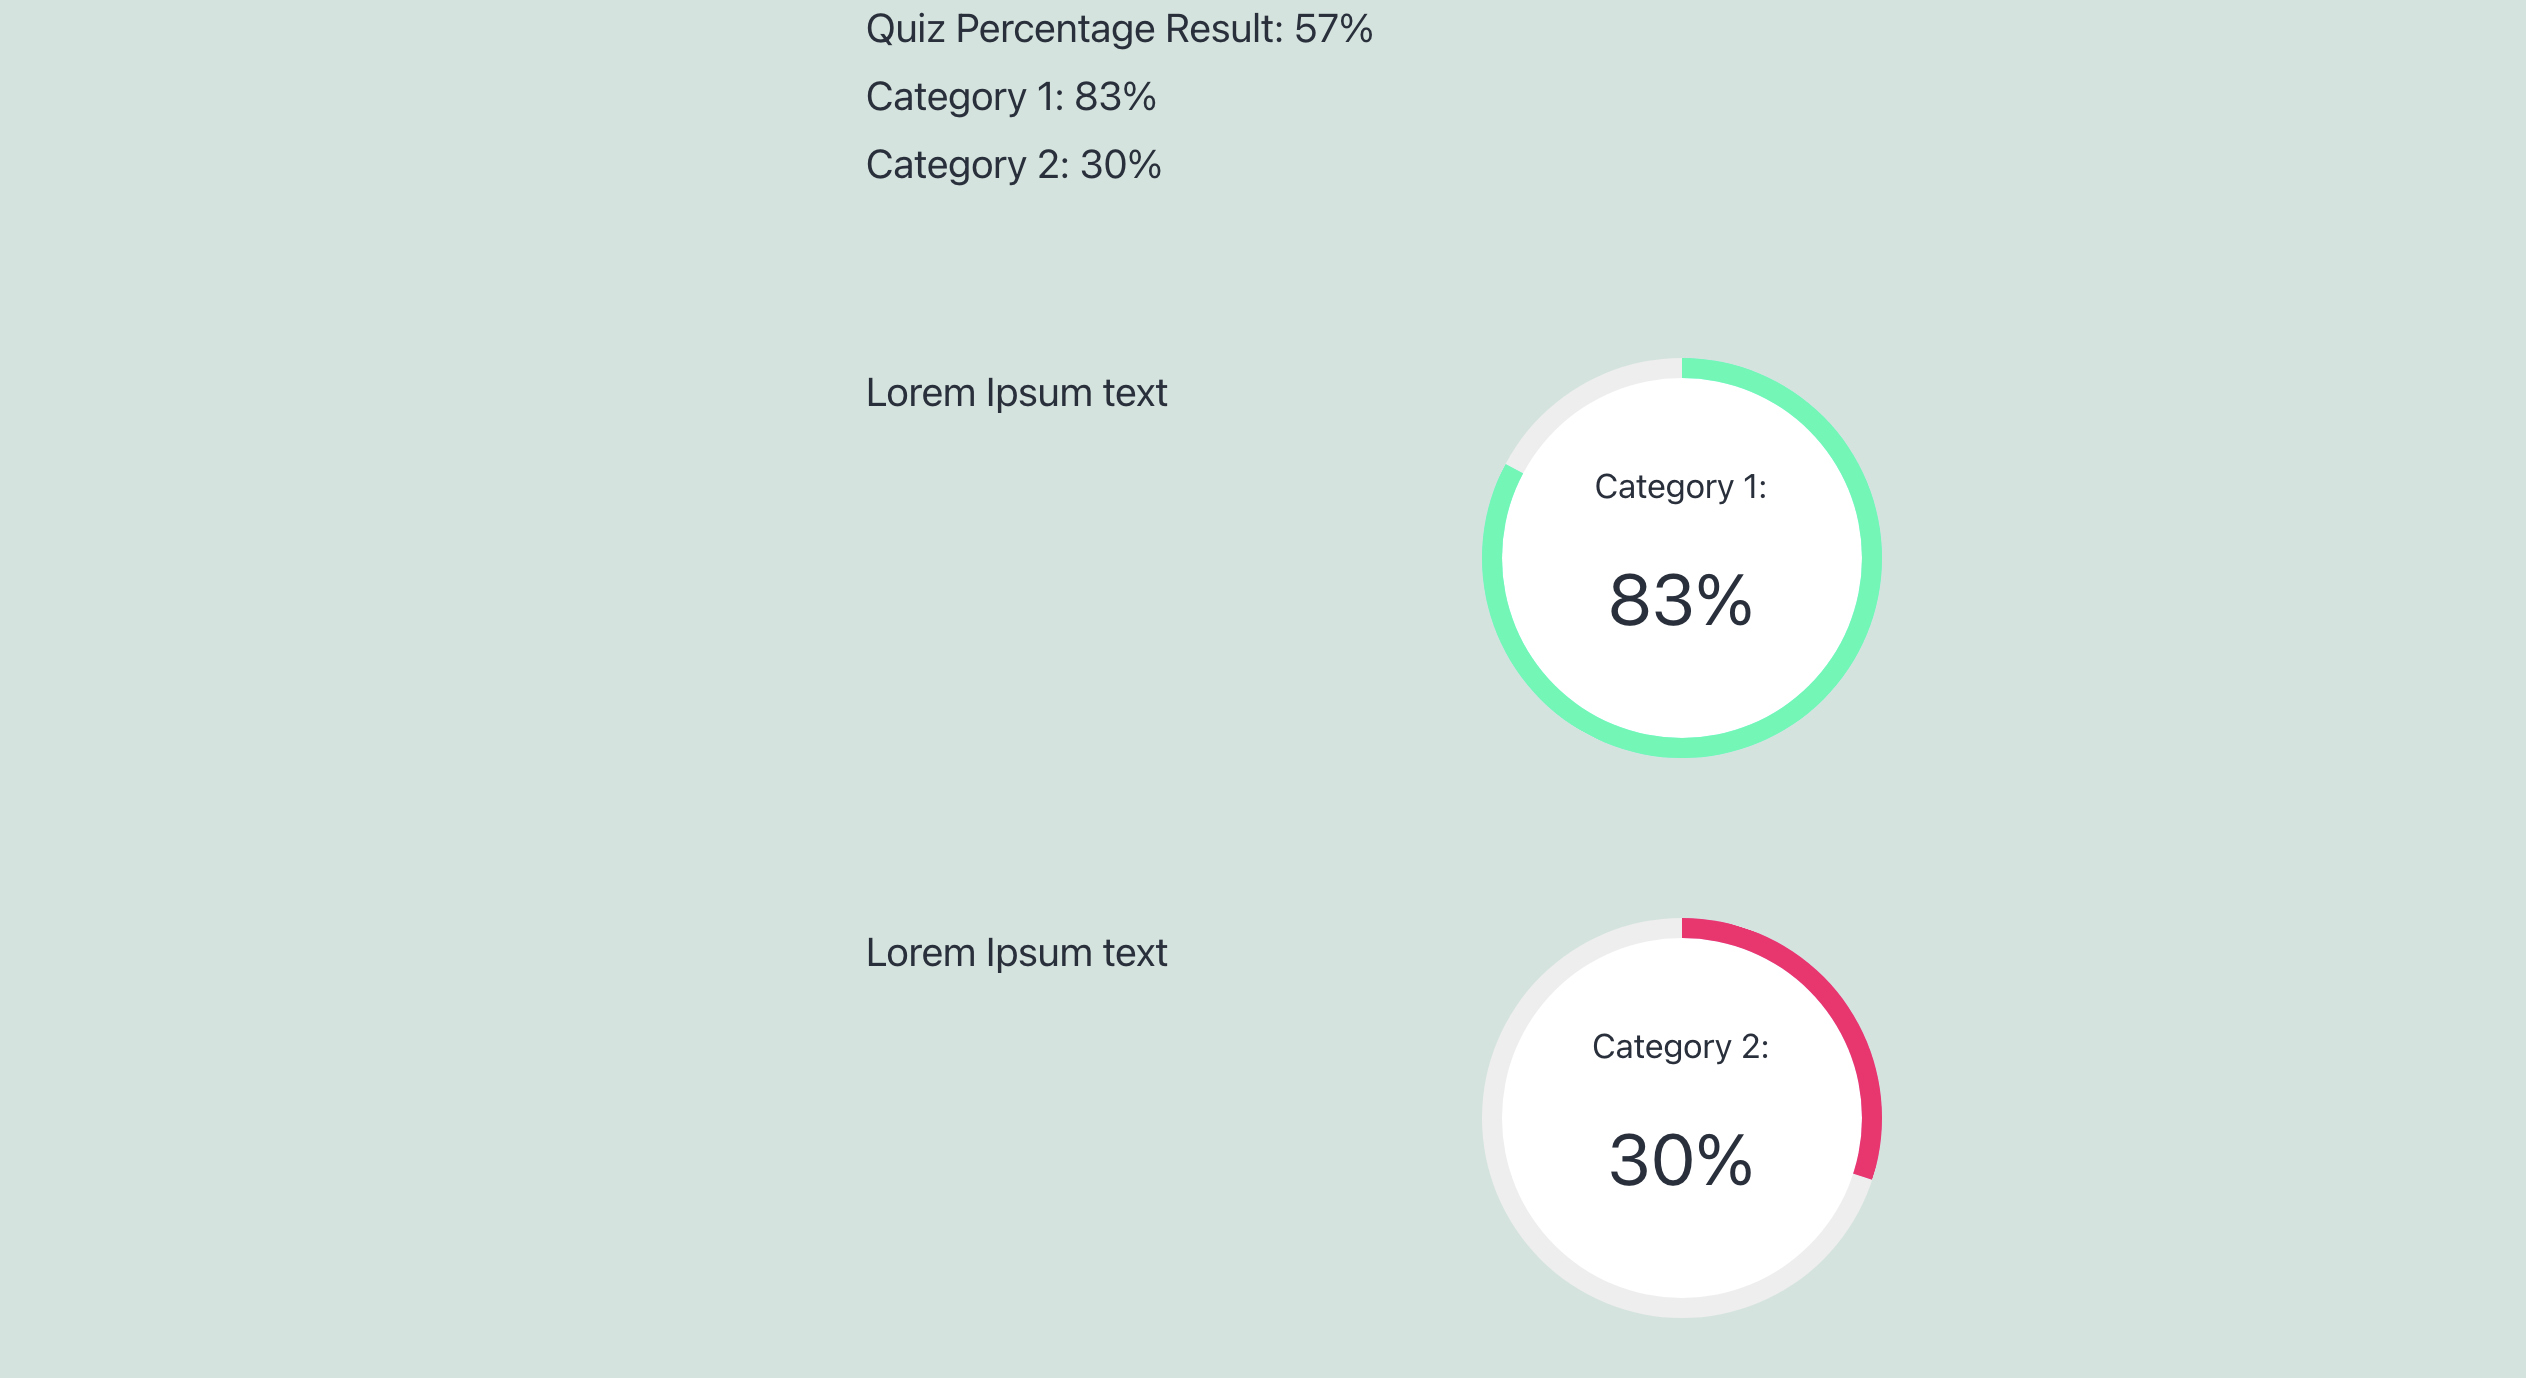
Now that it’s working the only thing that you need to do is to design the results page and you are done.
Design a count number for the results (Optional)
In the last part, we prepared for you an awesome design to show a round number count with colors.
1.1 The HTML code
In your text editor make sure that you are in a text editor and not in visual
Copy the following code:
<div class=”mf-circle-percent” data-percent=”[eid]{Category 1:4}[/eid]”>
<div class=”mf-circle-inner”>
<div class=”mf-round-per”></div>
</div>
<div class=”mf-circle-inbox”><span class=”mf-text”>Category 1:</span></div>
</div>
The only thing that you need to change in here is the merge tag with your custom merge tag and the span text
Notice: If you don’t use page builder don’t use the [eid][/eid] shortcode. You can use this snipper for every category, make sure you change the data-percent shortcode.

1.2 The CSS Code
Open your Customizer -> Add Css and copy the CSS
.mf-circle-percent {

    font-size:200px;

    width:1em;

    height:1em;

    position: relative;

    background: #eee;

    border-radius:50%;

    overflow:hidden;

    display:flex;

    margin: 0 auto;

}

.mf-circle-inner {

    position: absolute;

    left: 0;

    top: 0;

    width: 1em;

    height: 1em;

    clip:rect(0 1em 1em .5em);


}


.mf-round-per {

    position: absolute;

    left: 0;

    top: 0;

    width: 1em;

    height: 1em;

    background: #e4a6d2;

    clip:rect(0 1em 1em .5em);

    transform:rotate(180deg);

    transition:1.05s;


}

.mf-percent-more .mf-circle-inner {

    clip:rect(0 .5em 1em 0em);


}

.mf-percent-more:after {

    position: absolute;

    left: .5em;

    top:0em;

    right: 0; bottom: 0;

    content:”;

}

.mf-yellow::after{

  background-color: #f7951e;

}

.mf-green::after{

 background-color: #11fbb1;

}

.mf-circle-inbox {

    position: absolute;

    top: 10px;

    left: 10px;

    right: 10px;

    bottom: 10px;

    background: #fff;

    z-index:3;

    border-radius: 50%;

    text-align: center;


}

.mf-percent-text {

    font-size: 36px;

    z-index: 3;

    position: absolute;

    font-size: 36px;

    left: 50%;

    top: 60%;

    transform: translate(-50%,-50%);

    z-index: 3;

}

.mf-text {

    position: absolute;

    font-size: 17px;

    left: 50%;

    top: 30%;

    transform: translate(-50%,-50%);

    z-index: 3;

}
1.3 The jQuery code
To add this you will need to go to in WordPress Dashboard -> Settings – Insert Headers and Footers and paste the following snippet
<script>

jQuery( document ).ready(function() {

jQuery(“.mf-circle-percent”).each(function() {

    var $this = jQuery(this),

$dataV = $this.data(“percent”),

$dataDeg = $dataV * 3.6,

$round = $this.find(“.mf-round-per”);

$round.css(“transform”, “rotate(” + parseInt($dataDeg + 180) + “deg)”);

$this.append(‘<span class=”mf-percent-text”></span>’);

$this.prop(‘Counter’, 0).animate({Counter: $dataV},

{

duration: 2000,

easing: ‘swing’,

step: function (now) {

            $this.find(“.mf-percent-text”).text(Math.ceil(now)+”%”);

        }

    });

if($dataV >= 51){

$round.css(“transform”, “rotate(” + 360 + “deg)”);

setTimeout(function(){

$this.addClass(“mf-percent-more”);

},1000);

setTimeout(function(){

$round.css(“transform”, “rotate(” + parseInt($dataDeg + 180) + “deg)”);

},1000);

}

   if($dataV < 75){

$round.css(“background”, “#f7951e”);

     setTimeout(function(){

$this.addClass(“mf-yellow”);

},1000);

   };

  if( $dataV <= 33 ) {

$round.css( “background”, “#fc0f6e” ); };

  if( $dataV > 75 ) {

$round.css( “background”, “#11fbb1” );

  setTimeout( function() {

$this.addClass( “mf-green” );

},1000 ); };

});

});

</script>
This is how it will look like at the end.


